HyFlex Classroom User Guide
Option 1: Use of TELE Computer
Step 1. Power on the TELE computer, monitor, and TV.
Step 2. Sign in to your AnimoSpace (Canvas) and Zoom account.
Step 3. Start your Zoom class session from your Canvas Course’s Zoom meeting schedule.
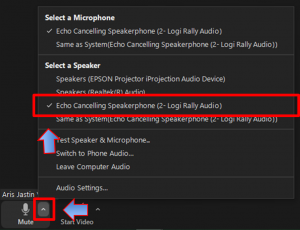
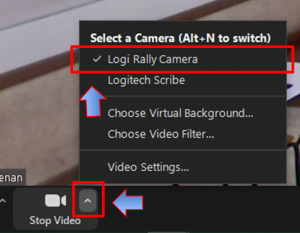
3.1. On the Zoom control bar, check that the audio and video settings are enabled. Your participants should hear and see the classroom.

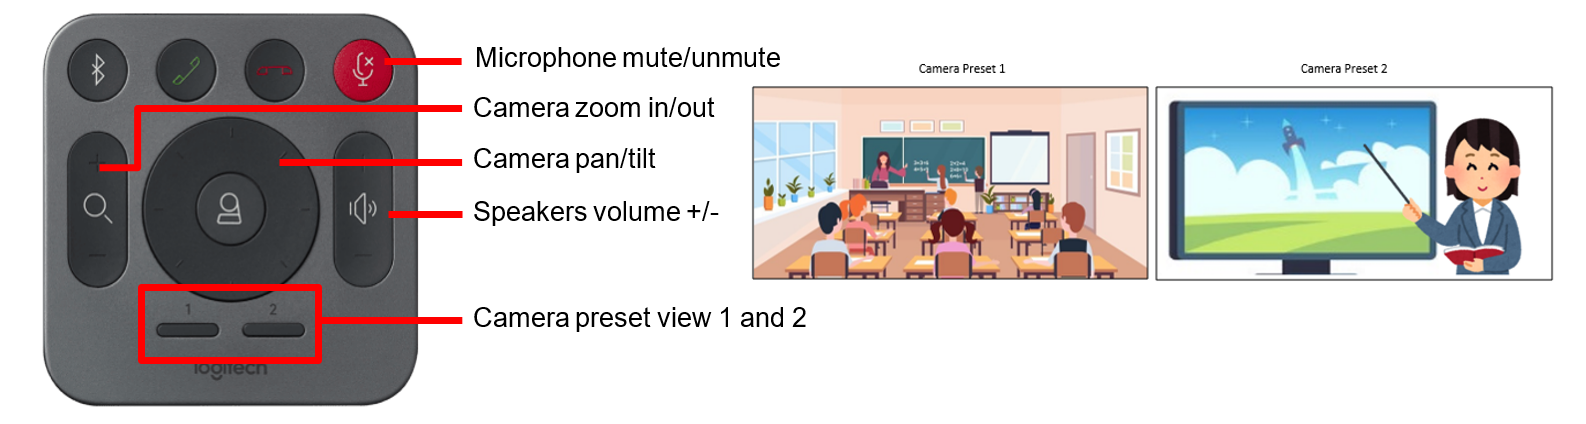
Step 4. Using the Logitech Rally remote pad provided in the room, choose between preset views 1 and 2, or can also set the camera view.
Step 5. Start screen sharing your presentation or the Logitech Scribe whiteboard camera.
5.1. To Screen Share the Logitech Scribe whiteboard camera, click the “Screen Share” button from the Zoom control bar.

On the “Share Screen” menu go to the “Advanced” tab. Choose “Content from 2nd Camera” and click the “Share” button.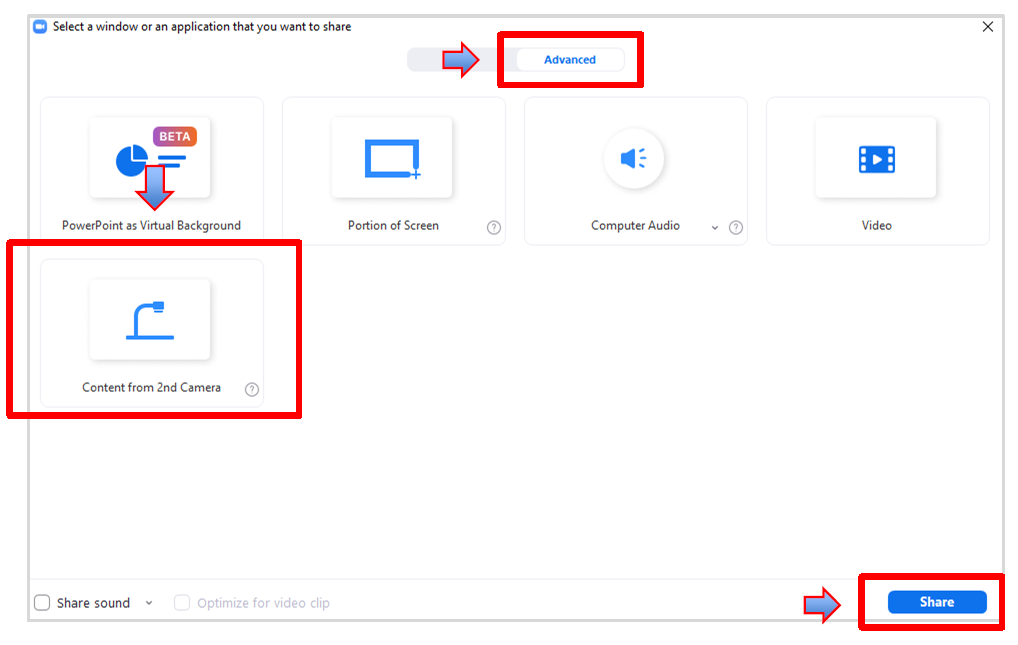
5.2. If you want to display both your presentation and Scribe whiteboard camera simultaneously on your participants, change the Zoom “Share Screen” option to your presentation (e.g. PowerPoint, Desktop screen, browser, etc.).

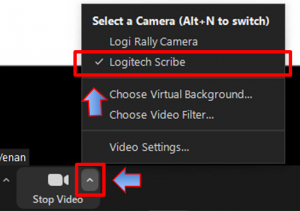
Next, change the camera source to “Logitech Scribe”.
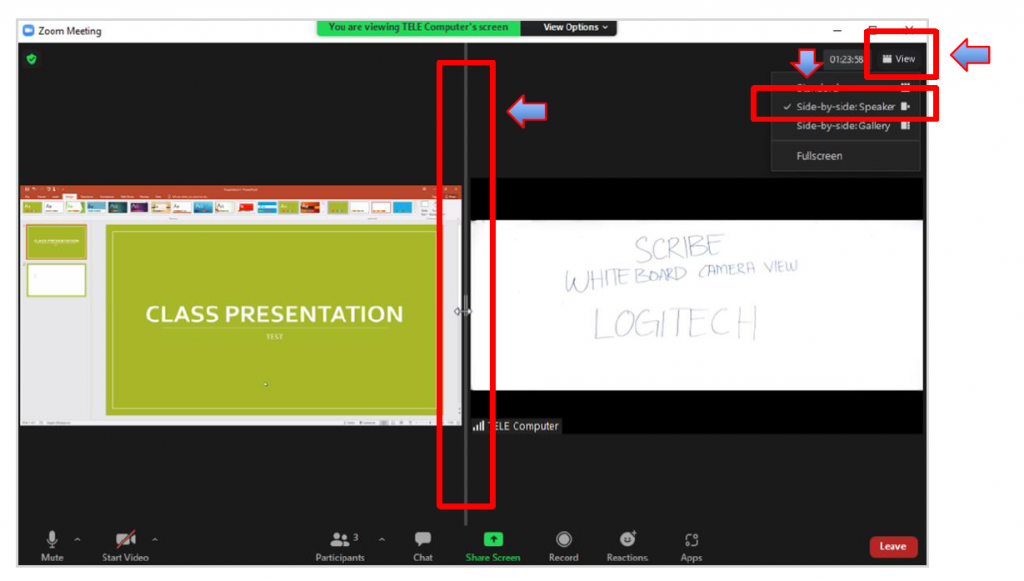
Then ask your participants to change their view in their Zoom app to “Side-by-side: Speaker”. They can slide the screen partition bar from side to side to increase the size of each screen.
5.3. If you want your participants to view only the classroom captured by the Rally camera or camera of the speaking participants, simply stop screen sharing.
Option 2: Use of Personal Device
Step 1. Power on the TELE computer, monitor, and TV.
Step 2. Sign in to your AnimoSpace (Canvas) and Zoom account.
Step 3. Start your Zoom class session from your Canvas Course’s Zoom meeting schedule.
3.1. On the Zoom control bar, check that the audio and video settings are enabled. Your participants should hear and see the classroom.
Step 4. Using the Logitech Rally remote pad provided in the room, choose between preset views 1 and 2, or can also set the camera view.

Step 5. Share screen the Logitech Scribe whiteboard camera.
5.1. To screen share the Logitech Scribe whiteboard camera, click the “Screen Share” button from the Zoom control bar.
5.2. On the “Share Screen” menu go to the “Advanced” tab. Choose “Content from 2nd Camera” and click the “Share” button.
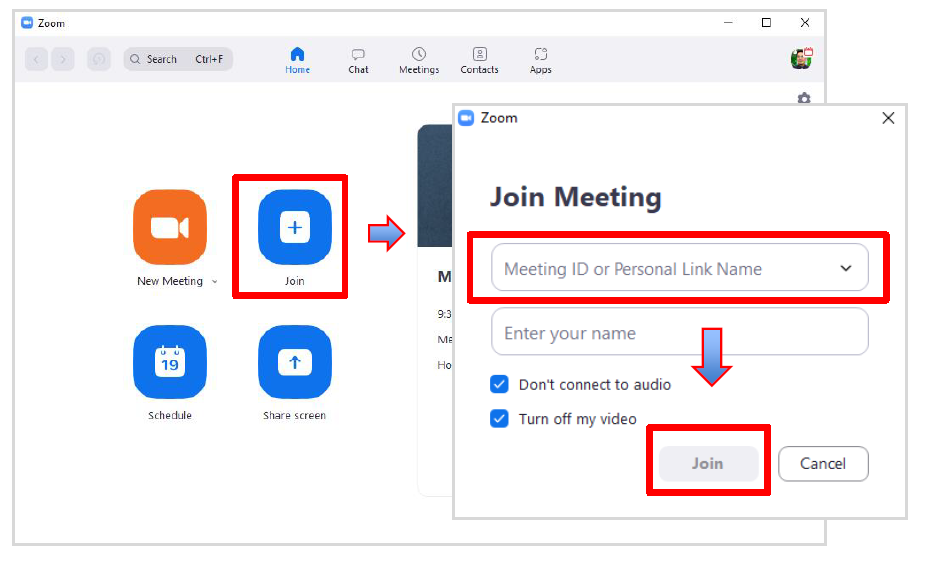
Step 6. Now from your device, sign in to your Zoom account. Click the Join button and enter your meeting ID. You can also join the meeting from your Canvas course.
6.1. You will be prompted to regain hosting or stay as co-host of the session when you joined. Choose “Stay Co-Host”.

6.2. Mute your device’s microphone and speaker to avoid feedback.
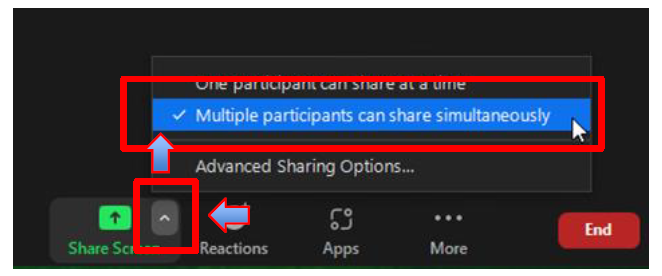
6.3. Set the Share Screen option to “Multiple participants can share simultaneously”. This is to allow simultaneous share screen from TELE computer and your device.
6.4. You can choose to turn off your camera since you will be using the room’s Logitech Rally camera.
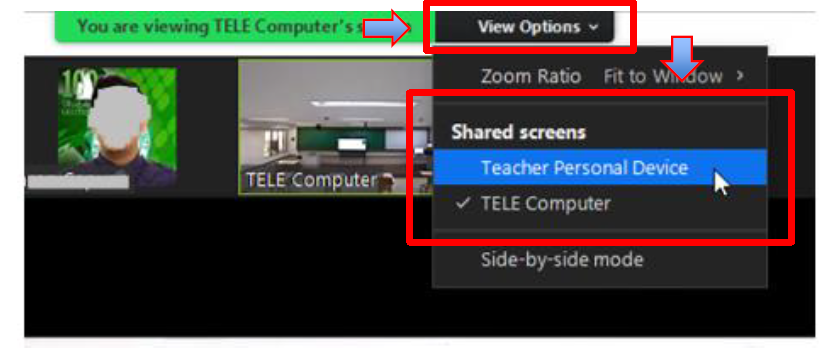
Step 7. Start screen sharing your presentation. On this setup, your participants have control over the share screen to be displayed on their devices. They can choose from the “Shared screens” from the “View Option of their Zoom app.
7.1. If you want to control the share screen to be displayed on your participants, simply share screen from your device or TELE computer one at a time.
7.2. If you want to display only the Scribe and classroom camera, simply end the share screen from your device.
7.3. If you want to display both your device presentation and Scribe whiteboard camera simultaneously on your participants, change the camera source to “Logitech Scribe” on the TELE computer.

Then ask your participants to change their “View Option” Shared Screens to Teacher’s device in their Zoom app.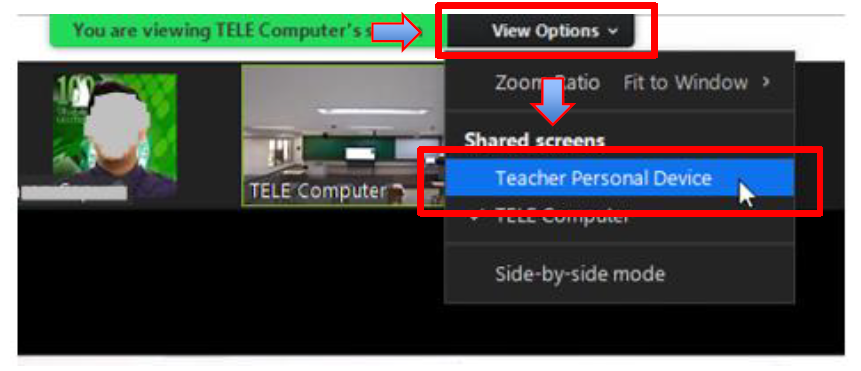
Also, to change their view to “Side-by-side: Speaker”. They can slide the screen partition bar from side to side to increase the size of each screen.
7.4. If you want your participants to view only the classroom captured by the Rally camera or camera of the speaking participants, simply stop screen sharing on both devices.
REMINDER
Before you leave please:
- Shut down the computer
- Turn off the monitor
- Turn off the TV
- Return the wireless presenter, TV remote, and Rally remote pad to the designated station
FAQ
| My online participants can’t hear us. |
LED Indicator: White – ON Red – muted No light – the device is disconnected or powered OFF |
| There is no audio in the room. Audio is not coming out from the room speakers. |
|
| My online participants can’t see the classroom view from the room’s camera. |
|
| There is a feedback sound coming from the room speakers. | Make sure that all participants inside the classroom, that is connected to the Zoom meeting, are muted on both mic and speaker on their devices. They can also use a headset to avoid this. |

Contact Information
- For reservation concerns, please contact [email protected].
- For synchronous technical assistance, you may contact ITS through the following:
- SMS: 0917-5873364
- Viber: 0917-5873364 (until 6:00 PM)
- Google Chat: itservices (until 8:00 PM)
- Hyflex Tech Support group chat (until 9:00 PM)
- Email: [email protected] (until 8:00 PM)
- To send a report, follow the format below:
- HyFlex <space> Name <space> Your concern <space> Bldg&Room No. <space> Your class schedule
Example: HyFlex Maria Cruz Mic not working Y301 730-900MW